A Guide to Concrete Finishes: Gray Broom, Salt, Aggregate, Textured & Stamped

Whether you’re planning a patio, driveway, pool deck, or outdoor living space, the finish you choose for your concrete has a big impact on both function and style. Concrete isn’t just a gray slab anymore — with the right finish, it becomes a design feature that complements your backyard space.

At Texas Backyard Living, we install a variety of concrete finishes that not only look great but are built to perform in Texas weather. Here’s your guide to the most popular options and how to choose the right one for your project.

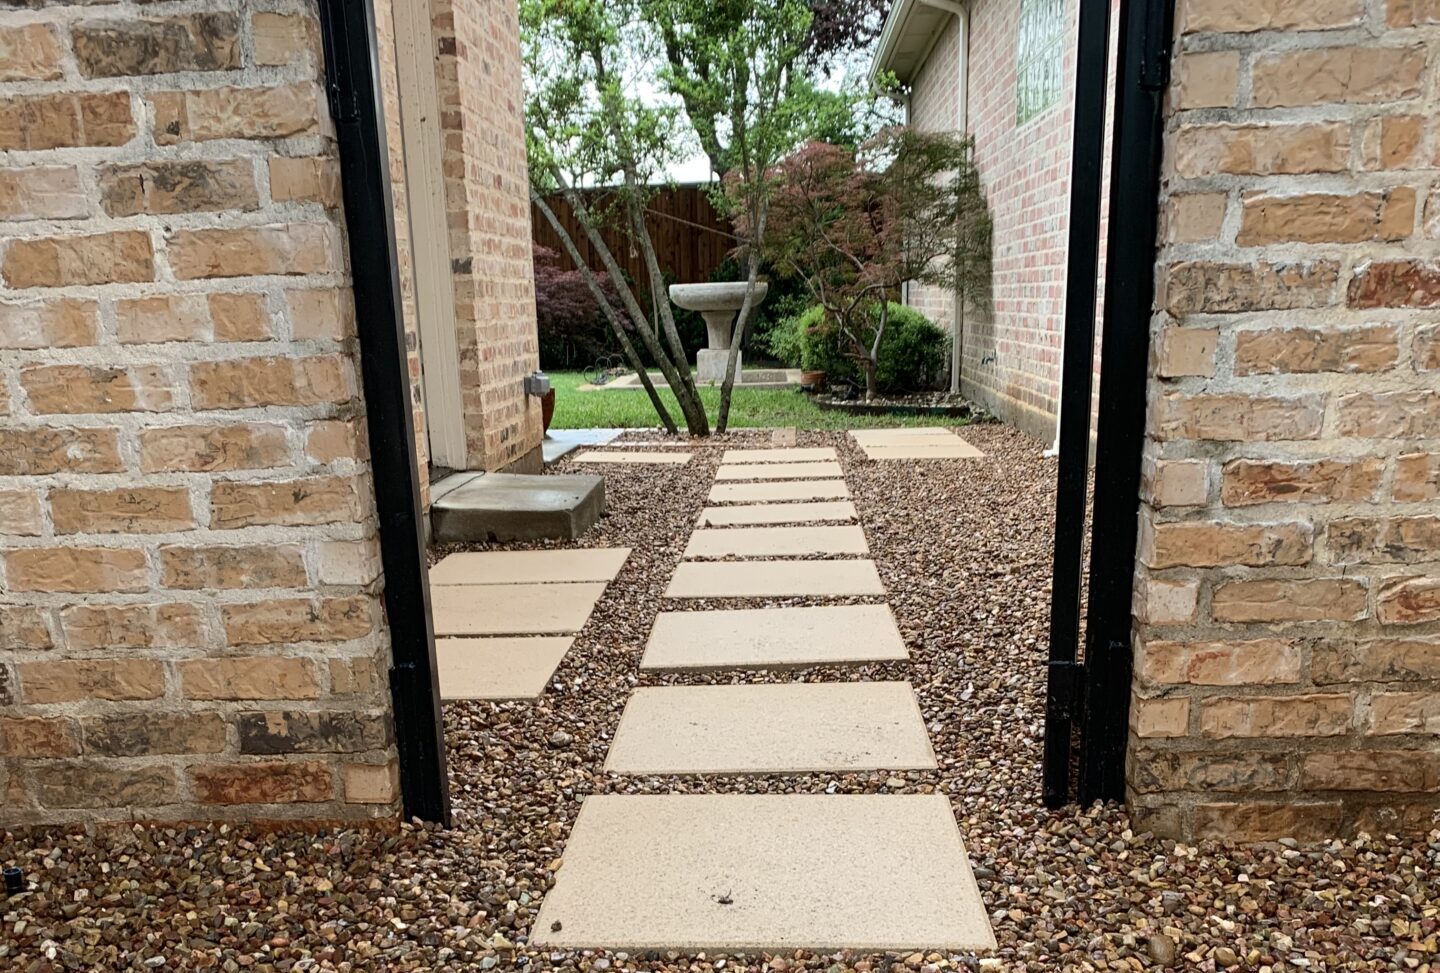
🧱 Gray Broom (Brush) Finish — Classic & Practical

This is the most common and affordable concrete finish. After the concrete is poured and leveled, a broom is dragged across the surface to leave a series of fine lines or grooves. 

Why it’s great:

  • Excellent slip resistance — especially important around wet areas like pool decks or patios. 
  • Durable and low-maintenance. 
  • Timeless, practical look that blends with any outdoor space. 

Best for: Driveways, walkways, patios, and outdoor entertainment spaces where traction and durability matter.

🧂 Salt Finish — Subtle Texture with a Natural Look

A salt finish adds gentle texture to concrete by broadcasting coarse rock salt across the surface while it’s still wet. Once the concrete partially sets, the salt is washed away, leaving behind tiny pits that create a natural stone-like texture

Why homeowners love it:

  • Adds visual interest without bold patterns. 
  • Good slip resistance while still feeling smooth underfoot. 
  • Works beautifully around pool decks and patios

Best for: Pool areas, walkways, and yard spaces where you want texture that’s a bit more decorative than broom finish.

🪨 Exposed Aggregate — Natural & Textured

Exposed aggregate finishes reveal the stones or decorative aggregate beneath the surface of the concrete. This is done by removing the top layer after the concrete has cured slightly, showing off a pebbled, textured surface

Benefits:

  • Highly slip-resistant and durable. 
  • Aesthetic appeal that feels organic and timeless. 
  • Great for blending with landscaping features. 

Best for: Driveways, walkways, patios, and pool decks that need both function and a natural design vibe.

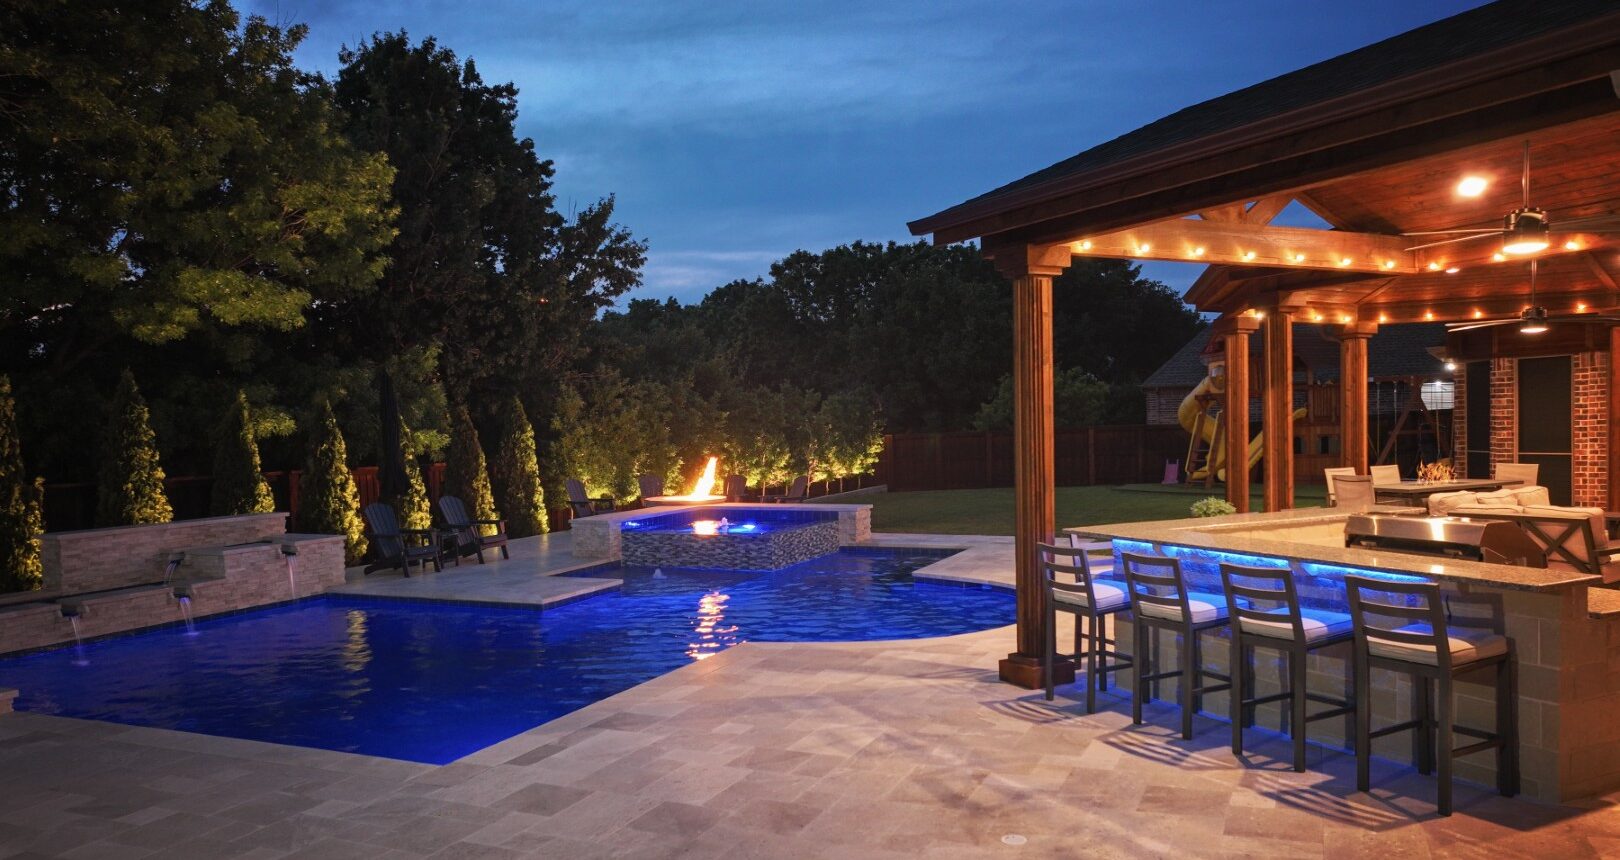
🎨 Stamped Concrete — High-Style, Customizable Look

Stamped concrete offers some of the most design-forward options. While the concrete is still wet, molds (or “stamps”) are pressed into the surface to create patterns that mimic natural stone, brick, tile, or wood. Color can be added during installation or with surface treatments afterward. 

Why it’s popular:

  • High-end appearance at a fraction of the cost of real stone or pavers. 
  • Tons of patterns and colors to match your backyard design. 
  • Works well in patios, pool decks, and outdoor living spaces. 

Best for: Areas where you want a custom, decorative focal point.

🧠 How to Choose the Right Finish

When deciding on a concrete finish, ask yourself:

  • Function first: Will this be a high-traffic area? Near a pool? Driveway?
  • Style: Do you want a subtle texture or a design statement?
  • Maintenance: Some finishes like stamped concrete look amazing but need regular sealing for best performance.

Concrete is one of the most versatile hardscaping materials — and with the right finish, it can boost both the usability and beauty of your outdoor space.

At Texas Backyard Living, we install a variety of concrete finishes that not only look great but are built to perform in Texas weather. Here’s your guide to the most popular options and how to choose the right one for your project.

What to Know Before Having a Fence Installed

Installing a new fence is one of the best ways to improve privacy, security, and curb appeal — but a successful project starts long before the first post goes into the ground. Understanding the process, preparing your property, and knowing what to expect can save time, prevent delays, and help your fence last for years to come.

Here’s what every homeowner should know before having a fence installed.


1. Check Property Lines and HOA Requirements

Before scheduling installation, make sure you know exactly where your property lines are located. Installing a fence even a few inches onto a neighbor’s property can create costly disputes later.

If you live in a neighborhood with an HOA, review the guidelines ahead of time. Many associations have rules about:

  • Fence height
  • Materials and color
  • Placement and style

Getting approval early helps avoid project delays or required changes after installation.


2. Understand City Permits and Regulations

Many cities require permits for new fences, especially for certain heights or materials. It’s important to confirm:

  • Maximum allowed height
  • Setback requirements
  • Visibility rules near streets or alleys

Clarifying these details upfront helps prevent unexpected issues during inspections. If a permit is required, it is important to have your property survey to start the permit process. 


3. Construction Is Messy — and That’s Normal

Fence installation is a construction project, which means things may look a little rough before they look finished. Crews will be digging holes, moving soil, carrying lumber, and using tools throughout your yard.

During installation, you may notice:

  • Dirt piles or muddy areas
  • Grass or landscaping being disturbed
  • Old fence debris or materials temporarily staged in the yard

This is all part of the process. If you have delicate landscaping, décor, or gravel areas near the fence line, moving or protecting them beforehand can help prevent damage.


4. Prepare Your Yard Before Installation Day

A little preparation makes installation smoother and faster. Before the crew arrives, consider:

  • Moving vehicles, outdoor furniture, and decorations away from the fence line
  • Marking irrigation lines or landscaping features
  • Trimming back bushes or overgrown grass

Clear access allows installers to work efficiently and helps avoid accidental damage.


5. Think About Your Sprinkler System

Sprinklers play a bigger role in fence longevity than many homeowners realize. Sprinkler heads that spray directly on a new fence can cause premature fading, rot, or mineral staining.

Before installation:

  • Identify sprinkler heads near the fence line.
  • Plan to adjust them so they don’t hit the wood.
  • Consider drip irrigation instead of spray heads along the fence.

This small step can significantly extend the life of your fence.


6. Expect Natural Wood Movement

If you’re installing a wood fence, it’s important to understand that wood is a natural material. Boards may shrink slightly as they dry, and minor variations in color or grain are normal.

Over time, weather and soil conditions can also cause slight movement in posts or gates. This doesn’t mean the installation was done incorrectly, it’s simply how wood behaves outdoors.


7. Plan for Gates and Traffic Flow

Think about how you’ll use your yard daily. Consider:

  • Where gates should be placed for convenience
  • Whether you need a double gate for equipment access
  • Clearance for trash bins, pets, or landscaping tools

Proper gate placement makes a big difference in how functional your fence feels long term.


8. Know the Maintenance Requirements

A new fence is an investment, and proper care helps it last longer. For wood fences especially:

  • Staining or sealing protects against sun and moisture.
  • Regular inspections help catch small issues early.
  • Keeping soil and sprinklers balanced around posts prevents shifting.

Many homeowners wait too long to protect their fence, which can shorten its lifespan.


9. Communicate with Your Neighbors

While it’s not always required, giving neighbors a heads-up about installation dates and fence placement can help maintain good relationships. It also gives them an opportunity to raise questions before construction begins.


Final Thoughts

Having a fence installed is an exciting upgrade, but preparation is key to a smooth experience. From checking permits and property lines to understanding that construction can be messy during the process, knowing what to expect helps reduce stress and surprises.

A well-planned fence installation doesn’t just look great on day one. It sets the foundation for years of durability, function, and curb appeal.

Creating a Seamless Indoor-Outdoor Flow in Your Home

In Texas, outdoor living isn’t a luxury—it’s a way of life. From warm spring mornings to long summer evenings and even those mild winter afternoons, our backyards are extensions of our homes. Creating a seamless indoor-outdoor flow lets you enjoy more space, more comfort, and more of what makes Texas living special.

Whether you’re planning a full renovation or just looking for smart upgrades, here’s how to blur the lines between inside and out—and make your home feel bigger, brighter, and better connected to nature.


Start With the Right Transitions

The key to a seamless flow is how you move from indoors to outdoors. Large openings instantly change how a space feels.

  • Sliding or folding glass doors open wide and visually erase the boundary between rooms and patios.
  • French doors offer a classic look while still allowing generous access and light.
  • Retractable screens keep bugs out without blocking views or breezes.

When doors are open, your indoor living room and outdoor patio should feel like one continuous space—not two separate zones.


Match Flooring for Visual Continuity

One of the easiest ways to connect indoor and outdoor areas is through flooring that complements—or even mirrors—each other.

  • Choose similar colors or textures inside and out.
  • Porcelain tile, natural stone, and concrete work beautifully in both environments.
  • Keep floor heights level to avoid visual breaks and tripping hazards.

When your eye doesn’t stop at the door threshold, the space feels larger and more cohesive.


Design Outdoor Spaces Like Indoor Rooms

Your backyard shouldn’t feel like an afterthought. Treat it with the same intention as your interior.

  • Define zones for lounging, dining, and entertaining.
  • Use outdoor rugs, throw pillows, and accent tables to add comfort and personality.
  • Install ceiling fans, heaters, or shade structures so the space stays usable year-round.

At Texas Backyard Living, we design outdoor kitchens, pergolas, and patios that feel just as polished and inviting as any indoor room.


Keep a Consistent Design Style

A seamless flow depends on a unified look and feel.

  • Carry your color palette from inside to outside.
  • Repeat materials like wood, stone, or metal accents.
  • Choose outdoor furniture that echoes your indoor style—modern, rustic, transitional, or traditional.

When the design language stays consistent, the transition feels natural and intentional.


Let Natural Light Lead the Way

Light is one of the strongest connectors between indoor and outdoor spaces.

  • Maximize windows and glass doors to flood interiors with sunlight.
  • Use outdoor lighting to extend the feeling after sunset—string lights, sconces, and pathway lights all help.
  • Position seating areas to take advantage of views and daylight.

The more your home responds to the outdoors, the more inviting it feels.


Add Functional Features That Bring People Together

Nothing blends indoor and outdoor living quite like shared experiences.

  • Outdoor kitchens let hosts cook without leaving the party.
  • Fireplaces or fire pits mirror indoor gathering spots and add warmth on cooler evenings.
  • Media setups—like weather-rated TVs and speakers—extend entertainment beyond the walls of your home.

These features encourage people to move freely between spaces without missing a moment.


Think About Climate and Comfort

Texas weather can be amazing—but it can also be intense. Planning for comfort ensures your outdoor space gets used year-round.

  • Provide shade with pergolas, covered patios, or umbrellas.
  • Install misting systems or fans for hot summer days.
  • Use durable, weather-resistant materials that can handle heat, sun, and sudden storms.

Comfort is what turns an outdoor area into a true extension of your home.


The Big Picture: Living Without Limits

A seamless indoor-outdoor flow isn’t just about design—it’s about lifestyle. It’s morning coffee with the doors open, family dinners that spill onto the patio, and evenings spent under the Texas sky without ever feeling like you’ve “left” home.

At Texas Backyard Living, we specialize in creating outdoor spaces that feel natural, functional, and beautifully connected to the homes they surround. When indoor comfort meets outdoor freedom, your entire home works better—and feels more alive.

If you’re ready to transform your backyard into a true extension of your living space, we’d love to help you make it happen.

Why It’s Important to Make Sure Your Sprinklers Don’t Hit Your Fence

When it comes to protecting your fence, most homeowners think about weather, age, or normal wear and tear. But one of the biggest causes of premature fence damage is something many people overlook: their sprinkler system. Sprinklers that constantly spray your fence may seem harmless, but over time they can cause serious problems that affect both appearance and structural integrity.

Here’s why adjusting your sprinklers away from your fence is one of the easiest ways to protect your investment.


1. Excess Moisture Leads to Rot and Decay

Wood and constant moisture simply don’t mix well. While a quality stain helps protect your fence from the elements, repeated daily soaking from sprinklers accelerates the breakdown of the wood.

When water hits the same sections of a fence day after day, it prevents the wood from fully drying out. This creates the perfect environment for:

  • Rot
  • Warping
  • Mold and mildew growth

Over time, boards may soften, split, or even fail completely — leading to costly repairs or early replacement.


2. Sprinklers Can Strip Away Protective Stain

Professional staining is designed to repel water and extend the life of your fence, but constant high-pressure water spray gradually wears down that protective coating.

You might notice:

  • Faded or uneven color
  • Streaking on boards
  • Faster deterioration in specific areas

When sprinklers repeatedly hit the same spot, it’s similar to pressure washing your fence every day — the finish simply won’t last as long as it should.


3. Hard Water Leaves Stains and Mineral Build-Up

Many irrigation systems use water that contains minerals like calcium and iron. When sprinklers hit your fence regularly, these minerals can leave behind white or rusty-looking deposits that are difficult to remove.

Not only does this affect the appearance of your fence, but mineral buildup can also interfere with how future stain coats absorb into the wood.


4. Soil Erosion Around Fence Posts

Sprinklers that spray directly at the base of your fence can slowly wash away soil and gravel around the posts. This may not be noticeable right away, but over time it can weaken the stability of your fence.

Loose or shifting posts often lead to:

  • Leaning sections
  • Gaps between boards
  • Structural instability

A simple sprinkler adjustment can help preserve the foundation of your fence for years longer.


5. Increased Maintenance Costs

One of the biggest reasons to keep sprinklers off your fence is simple: it saves money. Fences that are constantly exposed to irrigation typically need:

  • More frequent staining
  • Additional repairs
  • Earlier replacement

By redirecting your sprinkler heads just a few inches away from the fence line, you reduce long-term maintenance and extend the life of your investment.


Tips to Protect Your Fence from Sprinkler Damage

The good news is that preventing sprinkler-related fence issues is usually quick and easy:

  • Adjust sprinkler heads so they stop just short of the fence.
  • Check for overspray after any landscaping changes.
  • Use drip irrigation near fence lines instead of spray heads.
  • Periodically walk your yard during watering cycles to spot problem areas.

A Small Adjustment That Makes a Big Difference

Your fence plays an important role in your home’s curb appeal, privacy, and property value. Something as simple as redirecting your sprinklers can dramatically extend its lifespan and keep it looking its best.

If you’re noticing fading, uneven wear, or water damage along your fence line, your irrigation system might be the hidden culprit. Taking a few minutes to adjust it today can help prevent expensive repairs tomorrow.

Texas Backyard Living - Fence Company Near Me

Maintaining Your Cedar Fence in Texas

How to Maintain Your Cedar Fence in Texas: Expert Tips for Long-Lasting Beauty

A cedar fence adds timeless beauty and natural charm to any Texas property. But between the blazing sun, unpredictable storms, and humidity swings, your cedar fence takes a beating year-round. With a little care and maintenance, though, you can keep your fence looking great and structurally sound for decades.

Here’s how to maintain your cedar fence in Texas’s tough climate.


1. Start with a Quality Installation

Before you even think about maintenance, proper installation is key. Make sure your fence posts are set in concrete and that the boards don’t touch the ground. Direct soil contact traps moisture, leading to rot—especially in humid Texas areas.


2. Clean Your Fence Annually

Once a year, give your fence a good cleaning to remove dirt, mildew, and pollen buildup.

  • Mix a simple cleaning solution: one part bleach to three parts water (or use a wood-safe cleaner).

  • Apply it with a pump sprayer or soft brush.

  • Rinse thoroughly with a garden hose (avoid high-pressure washing, which can strip the wood).

Cleaning helps restore cedar’s warm tone and prevents mold growth.


3. Apply a UV-Protective Sealer or Stain

The Texas sun is powerful. Without protection, cedar will fade to a silvery gray. Applying a UV-blocking stain or sealer every 2–3 years helps preserve the rich color and protect against cracking and warping.

  • Semi-transparent stains let the wood grain show through while still providing sun and moisture protection.

  • Avoid clear sealers—they break down faster under intense sunlight.

Pro tip: Apply the sealer in spring or early fall when temperatures are moderate and humidity is lower.


4. Inspect for Damage Regularly

At least twice a year, walk your fence line and look for:

  • Loose nails or screws

  • Warped or cracked boards

  • Rotting posts or rails

  • Signs of termites or carpenter ants

Catching issues early prevents bigger repairs later. Replace damaged boards promptly and re-secure loose hardware.


5. Trim Vegetation Away

Overgrown plants trap moisture against the fence, which can cause mold and rot. Keep grass, vines, and shrubs trimmed back at least a few inches from the wood. This allows airflow and helps the fence dry quickly after rain.


6. Avoid Sprinkler Over-Spray

If you have an irrigation system, make sure sprinkler heads aren’t soaking the fence. Constant water exposure can lead to discoloration and rot—especially along the lower boards.


7. Re-Stain When the Water Test Fails

Wondering when to re-stain your cedar fence? Try the water test: sprinkle a few drops of water on the surface. If they bead up, your stain is still doing its job. If they soak in, it’s time for a fresh coat.


8. Protect Against Termites

Cedar is naturally insect-resistant, but not immune. For extra protection:

  • Keep soil and mulch from touching the fence base.

  • Apply a borate-based wood preservative if termites are common in your area.

  • Have regular pest inspections if your home or yard has had termite issues.


Final Thoughts

Texas weather can be harsh, but cedar is one of the best woods for outdoor fences thanks to its natural oils and durability. With the right maintenance routine—cleaning, sealing, and quick repairs—you’ll enjoy your cedar fence’s beauty for many years to come.

by Texas Backyard Living Blog

Fall Time in Texas

Fall in Texas is one of the best times to enjoy your backyard. The temperatures finally cool down, the air feels crisp, and evenings outdoors become more inviting. With the right touches, you can transform your outdoor space into a warm, cozy retreat perfect for relaxing or entertaining.

A custom fire pit or outdoor fireplace is one of the best ways to make your backyard fall-ready. Not only does it provide warmth on chilly nights, but it also creates a natural gathering spot for friends and family. At Texas Backyard Living, we often see homeowners in the Dallas–Fort Worth area choose stone fire pits or covered patio additions to extend the outdoor season well into fall and winter.

Lighting also plays a huge role in setting the mood. String lights, lanterns, or built-in lighting on a pergola or patio cover can create a soft glow that makes your backyard cozy long after sunset. Small details, like fall-themed planters, pumpkins, or outdoor candles, add charm and personality.

Whether you’re roasting marshmallows, sipping cider by the fire, or simply enjoying a quiet evening under the stars, your backyard can become the perfect seasonal escape. If you’re ready to upgrade your space, Texas Backyard Living specializes in building custom patios, pergolas, fire pits, and outdoor kitchens designed for year-round enjoyment.

Outdoor Lighting Ideas to Transform Your Space After Dark

When the sun goes down, your outdoor space doesn't have to fade into darkness. With the right lighting, you can extend your evenings, highlight your landscape, and create a cozy ambiance that invites relaxation and connection. Whether you’re hosting a summer party or simply enjoying a quiet night under the stars, the magic lies in your lighting choices.

Here are some creative ways to use string lights, lanterns, and path lighting to enhance both the ambiance and safety of your outdoor space.


1. Set the Mood with String Lights

String lights are a timeless favorite for a reason. They're affordable, easy to install, and instantly elevate the atmosphere.

Ideas for Using String Lights:

  • Overhead Canopies: Drape string lights across patios, pergolas, or between trees to create a soft, overhead glow that mimics a starlit sky.

  • Fence or Wall Accents: Weave string lights through a fence or attach them to an exterior wall to add subtle background lighting.

  • Tabletop Touch: Wrap battery-powered string lights around a centerpiece or along the middle of a dining table for an intimate dinner vibe.

Pro Tip: Opt for warm white or soft amber bulbs to keep the look cozy and inviting—not clinical or harsh.


2. Create a Glow with Lanterns

Lanterns bring charm and versatility to your outdoor design. Whether they’re hanging, freestanding, or solar-powered, they add a lovely glow and rustic elegance.

Ideas for Using Lanterns:

  • Clustered on the Ground: Place different-sized lanterns along stairs, near seating areas, or beside doorways to add visual interest.

  • Hanging Lanterns: Suspend lanterns from tree branches, hooks, or shepherd’s poles to light up garden paths or lounge zones.

  • Table Lanterns: A single lantern with a flickering LED candle can serve as a perfect centerpiece for nighttime dining.

Pro Tip: Mix and match styles—metal, wood, or glass—for a collected, personalized look.


3. Light the Way with Path Lighting

While ambiance is key, safety should never be overlooked. Path lighting ensures guests can safely navigate your yard while adding structure and elegance to your outdoor space.

Ideas for Using Path Lighting:

  • Solar Stake Lights: These are energy-efficient and easy to install—perfect for lining walkways, garden beds, or driveways.

  • Recessed Deck Lights: For a more modern look, consider lights embedded into decks, stairs, or patio floors to highlight boundaries.

  • Spotlights for Features: Use subtle spotlights to accent trees, sculptures, or water features for dramatic nighttime focal points.

Pro Tip: Space lights evenly, but not too close together. You want to guide the way, not spotlight the ground like a runway.


Bringing It All Together

By layering your lighting—using string lights for ambiance, lanterns for charm, and path lighting for function—you can create a magical and practical space that’s perfect for evening entertaining or late-night lounging.

So go ahead, mix textures, play with heights, and experiment with warm hues. With a little creativity, your backyard, balcony, or garden can shine just as beautifully after dark as it does during the day.


Ready to transform your backyard into the outdoor space of your dreams? Contact us today to schedule a free estimate!

Low-Maintenance Landscaping Ideas for Outdoor Living Areas

When it comes to enjoying your outdoor space, the last thing most homeowners want is to spend their weekends weeding, watering, or constantly replacing plants. The good news? A stunning backyard doesn’t have to be high-maintenance.

At Texas Backyard Living, we help homeowners create outdoor areas that are both beautiful and easy to care for—even in the face of Texas heat and unpredictable weather. Whether you're planning a total backyard makeover or just want to cut down on maintenance, here are some smart landscaping ideas that will give you more time to relax and less time on yard work.

1. Choose Drought-Tolerant Plants

Texas summers can be brutal, so selecting plants that thrive in dry conditions is key to a low-maintenance yard. Drought-tolerant landscaping, also known as xeriscaping, is both eco-friendly and cost-effective.

Top choices include:

  • Texas Sage: Hardy, heat-tolerant, and adds vibrant purple blooms.

  • Lantana: Colorful, low-water, and attracts butterflies.

  • Yucca and Agave: Bold architectural plants that need minimal watering.

  • Salvia and Lavender: Add color and scent, and thrive in hot, dry areas.

  • Ornamental grasses: Like Muhly or Fountain Grass, which add texture and movement.

Once established, these plants require little water, minimal pruning, and no fuss—perfect for busy homeowners.

2. Incorporate Hardscaping to Cut Down on Lawn Care

Hardscaping is one of the most effective ways to reduce outdoor maintenance. It replaces traditional grass and flower beds with permanent features like stone, pavers, and gravel—giving you an attractive and functional space with far less upkeep.

Ideas for low-maintenance hardscaping:

  • Patios and walkways: Use flagstone, stamped concrete, or pavers for elegant, easy-to-clean surfaces.

  • Gravel beds: Great for areas where nothing grows or where you want to cut down on watering.

  • Retaining walls or raised planters: Help manage slopes and reduce the need for mowing or weeding.

  • Dry creek beds: A beautiful, natural way to manage runoff and replace high-maintenance garden zones.

Hardscaping also pairs beautifully with outdoor features like pergolas, fire pits, and outdoor kitchens—making your yard more usable and stylish year-round.

3. Opt for Easy-Care Outdoor Furniture

Not all patio furniture is created equal. Some materials require regular sealing or rust prevention, while others can withstand the elements with almost no upkeep.

Look for furniture made from:

  • Powder-coated aluminum: Rust-resistant and lightweight.

  • Synthetic wicker: Offers the look of woven furniture but handles weather better.

  • Teak or composite wood: Durable, timeless, and needs little more than occasional cleaning.

  • Sunbrella or weather-resistant fabrics: For cushions and pillows that won’t fade or mildew.

Keep your layout simple. Modular seating, storage benches, or built-in furniture options can help reduce clutter and make the space more functional with less effort.

4. Install Smart Irrigation (or Skip It Altogether)

If you do include plants or a small lawn area, using a drip irrigation system can significantly cut down on water usage and time spent manually watering. These systems deliver water directly to plant roots, reducing waste and encouraging healthy growth.

Want to go fully low-maintenance? Consider skipping a lawn entirely and embracing gravel, mulch, pavers, or artificial turf for a clean, polished look that requires zero watering or mowing.

5. Add Mulch or Ground Cover to Suppress Weeds

Organic mulch, decomposed granite, or rubber mulch around your plants and in beds helps retain moisture, prevent weeds, and keep your landscape looking tidy. It’s a small investment with big returns in reduced maintenance.

Enjoy More, Work Less

The key to a low-maintenance landscape is smart design. With drought-resistant plants, smart hardscaping, and weather-ready furniture, you can build a space that looks great year-round—with minimal upkeep.

At Texas Backyard Living, we help homeowners all over the Dallas–Fort Worth area create outdoor living spaces that are functional, beautiful, and built to last. Whether you want to update your landscaping or completely transform your backyard, our team is here to bring your vision to life.

Contact us today to schedule a free consultation and start designing your low-maintenance dream backyard.

Summer Backyard Essentials: Must-Have Features for Entertaining

Summer is the season for sunshine, laughter, and unforgettable backyard gatherings. Whether you're planning laid-back barbecues or stylish evening soirees, creating the perfect outdoor entertaining space is key. With the right setup, your backyard can become the ultimate destination for friends and family all season long. Here are the must-have backyard essentials that will take your summer entertaining to the next level.


1. Outdoor Kitchen & Grill Station

The heart of any great summer gathering is the food. An outdoor kitchen or built-in grill station not only makes cooking more enjoyable, but it also keeps the host in the middle of the action. From built-in gas grills to smokers and pizza ovens, a fully equipped outdoor kitchen adds serious flavor and flair to your backyard. Include prep space, a sink, and even a mini fridge to make meal prep and serving seamless.

Pro Tip: Add bar seating near the grill area to keep guests engaged while the food is cooking.


2. Comfortable Lounge Furniture

No one wants to perch on a wobbly lawn chair for hours. Invest in quality lounge furniture with weather-resistant cushions and durable frames. Sectionals, chaise lounges, and cozy outdoor sofas encourage guests to relax and stay a while. Don’t forget side tables for drinks and snacks.

Style Tip: Mix textures and materials like teak, wicker, and metal for a modern, resort-like vibe.


3. Dining Area for Alfresco Meals

In addition to lounging, a dedicated dining area is essential for serving meals comfortably. Choose a sturdy outdoor dining set that fits your usual guest count, with an umbrella or pergola overhead for midday meals. Extend your indoor style outdoors with tableware, placemats, and lighting that suits your aesthetic.

Bonus: Add a buffet or serving cart to simplify food and drink service.


4. Shade Options to Beat the Heat

A beautiful summer day can quickly become uncomfortable without proper shade. Protect your guests (and your furniture) with solutions like pergolas, retractable awnings, sail shades, or large umbrellas. For a more permanent feature, consider a pavilion or gazebo for year-round use.

Comfort Upgrade: Install outdoor fans or misting systems for extra relief on especially hot days.


5. Lighting for Ambiance and Safety

As the sun sets, lighting becomes essential for both ambiance and functionality. String lights, lanterns, solar-powered path lights, and LED garden lights create a magical atmosphere while keeping your space well-lit. Fire pits and outdoor fireplaces also provide both warmth and a natural gathering point.

Safety First: Illuminate steps, walkways, and edges of patios to help guests navigate after dark.


6. Entertainment Features

Add a touch of fun with backyard entertainment options. A Bluetooth speaker system, outdoor movie screen, or even lawn games like cornhole and giant Jenga can keep the party lively. If you’re feeling ambitious, a small outdoor bar or beverage station is a crowd-pleaser.

Pro Host Tip: Set up themed stations—think margarita bars, taco stands, or DIY s’mores stations—for a memorable guest experience.


Make Your Backyard the Place to Be

Transforming your backyard into a summer-ready entertaining zone doesn’t require a massive renovation—just thoughtful planning and a few key pieces. With a functional layout, comfortable seating, and the right amenities, your outdoor space can become your favorite “room” in the house.

So fire up the grill, chill the drinks, and send out those invites—summer entertaining season is officially on!

How Often Should You Stain Your Fence?

Fences are not just functional; they’re a vital part of your home’s aesthetic appeal. However, exposure to sun, rain, and other elements can wear down your fence over time, leading to cracks, discoloration, and even rot. Staining your fence every 3-5 years is one of the best ways to preserve its beauty and functionality. Here’s why you should trust professionals like our sister company Texas Best Stain to handle the job for you.

Why Stain Your Fence?

  1. Protects Against Weather
    • Stain acts as a barrier, protecting your fence from moisture, UV rays, and extreme temperature changes.
    • It prevents the wood from absorbing water, which can lead to swelling, warping, and decay.
  2. Extends Fence Longevity
    • Regular staining helps prevent rotting and deterioration, ensuring your fence lasts for many years.
  3. Enhances Appearance
    • Stain brings out the natural grain of the wood, improving its overall look and complementing your landscaping.
  4. Cost-Effective Maintenance
    • Regular staining prevents costly repairs or replacements down the road by keeping the wood in good condition.

When to Stain Your Fence

  • Timing Matters: Stain your fence every 3-5 years, depending on the type of wood and the climate you live in. For areas with harsh weather, such as the Texas heat, consider staining closer to the 3-year mark.
  • Weather Conditions: Professional staining is best scheduled in temperatures over 40 degrees with no rain in the forecast for at least 24 hours.

Why Hire Professionals for Fence Staining

  1. Expert Preparation
    • Our team ensures your fence is thoroughly cleaned, inspected for damage, and prepared for staining. This includes removing dirt, mold, and mildew, as well as repairing or replacing damaged parts.
  2. High-Quality Stains and Equipment
    • We use only the best stains that provide long-lasting protection and beauty, whether you prefer transparent, semi-transparent, or solid finishes.
    • With professional-grade tools and techniques, we ensure even application and thorough coverage.
  3. Precise Application
    • Our trained experts know the right techniques to apply stain efficiently and effectively. From ensuring all sides of the boards are covered to applying the stain until it is fully saturated for optimal protection, we’ve got you covered.
  4. Time-Saving and Hassle-Free
    • Staining a fence can be time-consuming and physically demanding. By hiring us, you save valuable time and avoid the mess and stress of doing it yourself.

Final Thoughts

Staining your fence every 3-5 years is essential for protecting your investment and enhancing your property’s curb appeal. As a professional staining company, we take pride in delivering high-quality results. Let us handle the hard work while you enjoy a beautiful, long-lasting fence. Contact us today to schedule your next fence staining service!